AI Rehearsal Tracks
If you need part-learning tracks in a rush (or for proto-typing), you can use software to create AI rehearsal tracks like the sample below.
"We Sail the Ocean Blue," Gilbert and Sullivan
This file demonstrates phoneme errors typical in the absence of manual correction of pronunciation.
You can learn how for free!
You can use the instructions on this page.
Members of the Synth V for Choral Arrangers Facebook Group are happy to provide guidance.
I learned about AI singing synthesis by being a member of the London City Voices (LCV). Joining the LCV is a fantastic way to hear AI singing technology used in online choral rehearsals and to learn about additional apps and techniques not described in the steps below.
(I'm neither endorsed by LCV or the Synth V for Choral Arrangers Facebook Group).
What can I do easily? Is it good enough for my choir?
The audio file above is a mixed ("balanced") track that was made using the steps on this page. The English pronunciation has not been corrected, so you can hear that the ending phoneme for "duty," for example, is incorrect. However, if you just want to have rough tracks to help chorus members learn notes and rhythms in their cars, this kind of pronunciation error is often tolerable. If you have a Sibelius or MusicXML file from the composer/arranger and phoneme errors like the one I just pointed out are OK for your chorus, you'll be able to use the steps below to make rehearsal tracks quickly.
Instructions
Requirements
These instructions are written assuming you have the following installed.
- Sibelius Artist or higher (the free Sibelius First app doesn't allow importing of enough staves of music for a lot of choral music). I'm using Sibelius here because I haven't yet found another music notation app that properly exports MIDI with lyrics.
- Dreamtonics Synthesizer V Studio Pro. cantamus.app also works and gives a more "classic" choral sound (rather than a more CCM sound), but you have to wait for the audio to render, and sometimes after you wait a while, you find an error message that is hard to troubleshoot.
- At least one Dreamtonics Synthesizer V voice bank, which you can order when ordering Synthesizer V Studio Pro. The example below uses the Kevin and Asterian voices.
1. Convert digital sheet music to MIDI with lyrics
- Ask the composer/arranger for the sheet music in Sibelius or MusicXML format. For the example screenshots in these instructions, let's use the MusicXML file for Gilbert & Sullivan's "We Sail the Ocean Blue," available in the public domain at MuseScore.
If the composer's Sibelius or MusicXML file isn't available, create a transcription of a PDF of sheet music by creating a Newzik Livescore. Getting the Sibelius or MusicXML file from the composer is preferred—much less need for proofreading and correcting (Newzik's AI transcription makes mistakes, but it's the best I've seen).
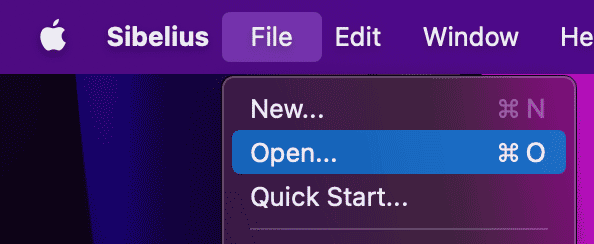
- Open Sibelius. Open the sheet music for your song by clicking File > Open….
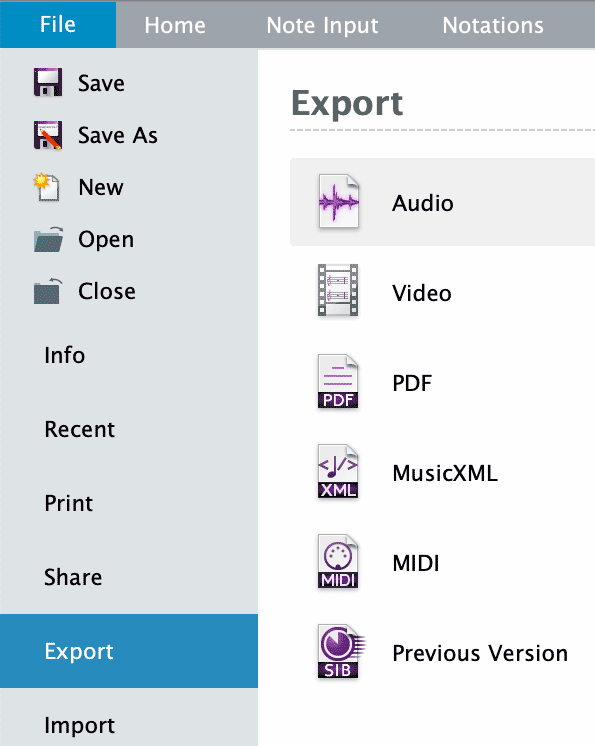
- In the Sibelius ribbon, click File, select Export from the list below and click on MIDI in the Export menu.

- Click the MIDI Export button and save your MIDI file.
2. Export accompaniment track
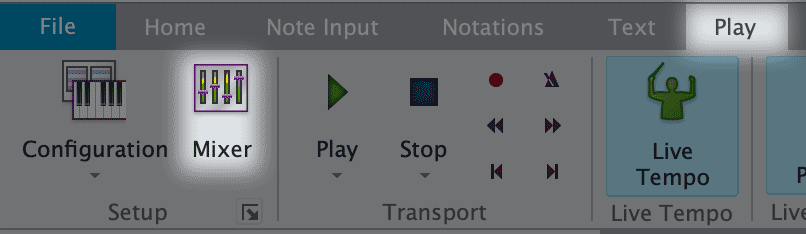
- In the Sibelius ribbon, click Play and the Mixer icon.
- In the mixer, click the bars icon
 to reveal the solo button for each track (one click should be enough).
 - For each accompaniment track, click the solo button
 to make it yellow
  .
. - In the Sibelius ribbon, click File, select Export from the list below, and click on Audio in the Export menu.
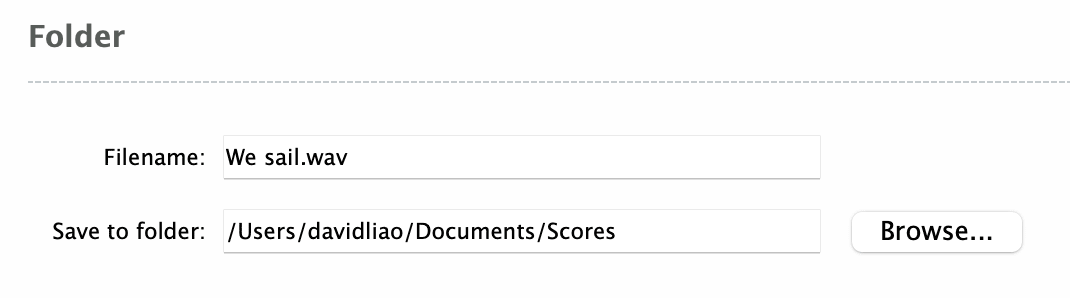
- Under Folder, choose a location for your accompaniment audio file.
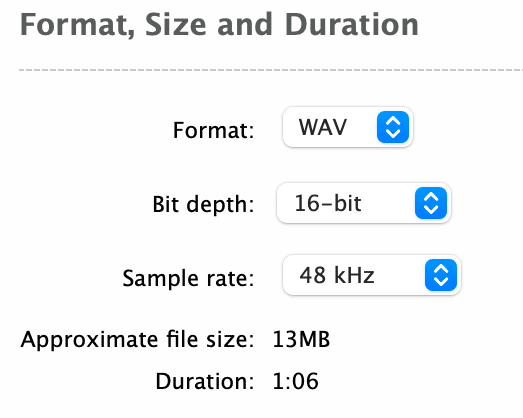
- Under Format, Size and Duration, set Format to WAV and Sample rate to 48 kHz.
-
Click the Export button.
3. Convert MIDI music to AI singing
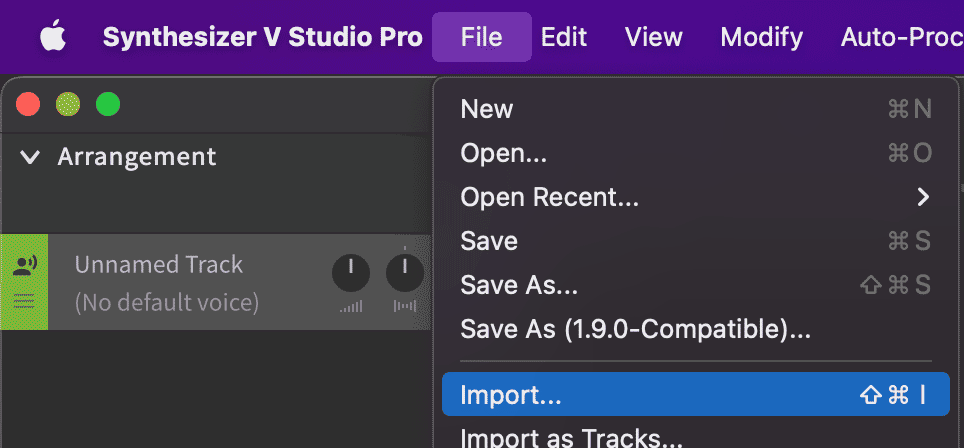
- Open Synthesizer V. Import your MIDI file by clicking File > Import….
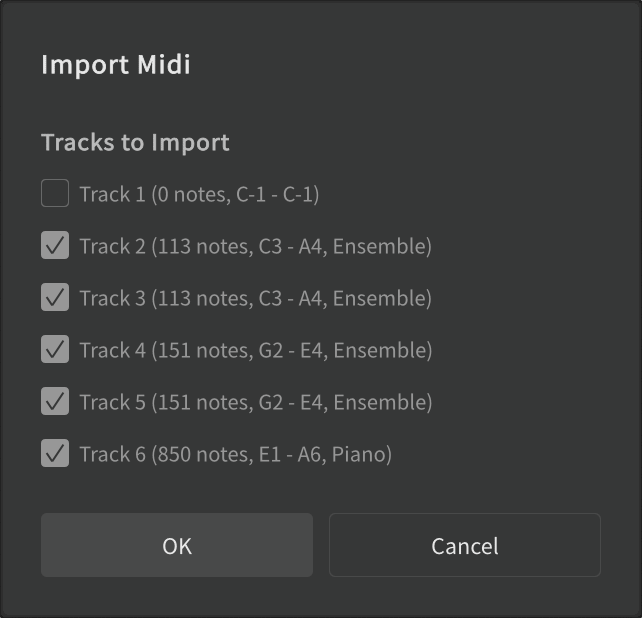
- Click OK when asked what tracks to import.
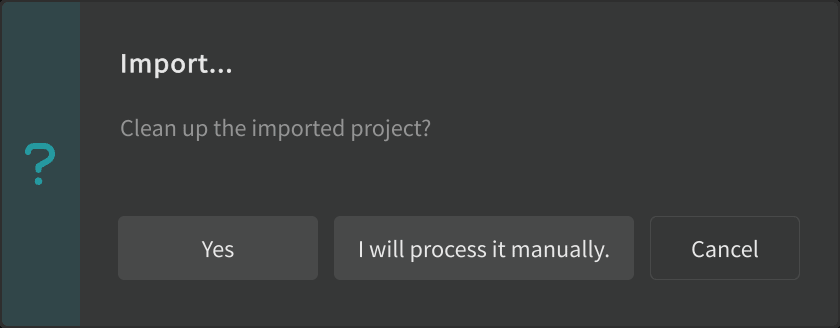
- Click I will process it manually when asked whether to clean up the imported project.
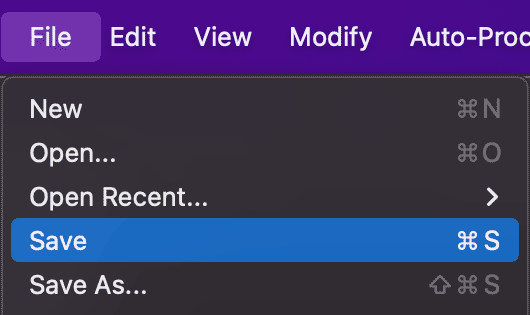
-
Click File > Save. Keep using this command now and then to save your work.
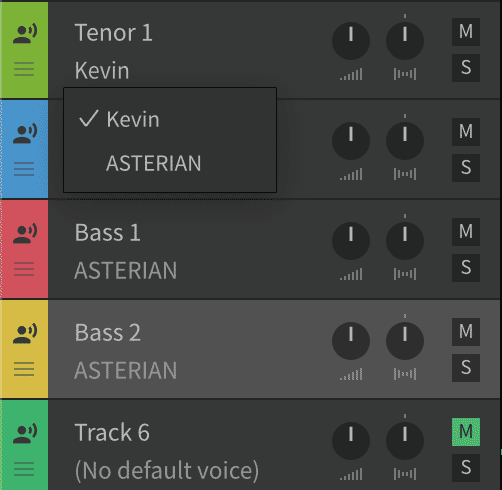
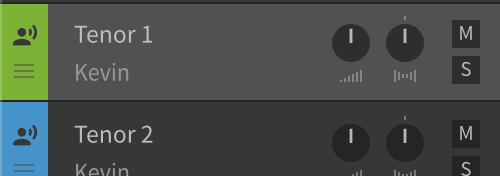
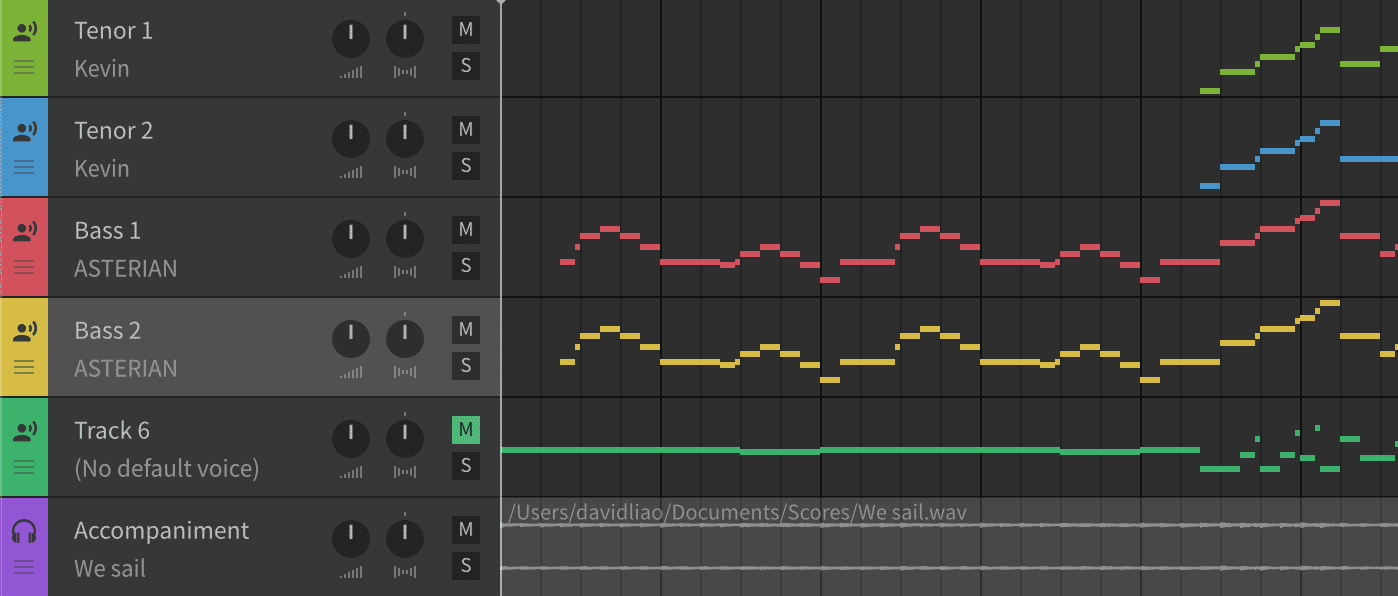
- For each track, change the name to something descriptive. For example, "Tenor 1" is easier to understand than "Track 2". Change the voice type from "(No default voice)" to an installed voice. "Kevin" sings tenor and baritone well. "Asterian" sings baritone and bass well. Mute the accompaniment track.
- Click to highlight one of your tracks (Tenor 1 in the screenshot below).
- Click somewhere blank in the Piano Roll. Press Cmd+A (Mac) or Ctrl+A (Windows) to select all notes (all notes become highlighted).
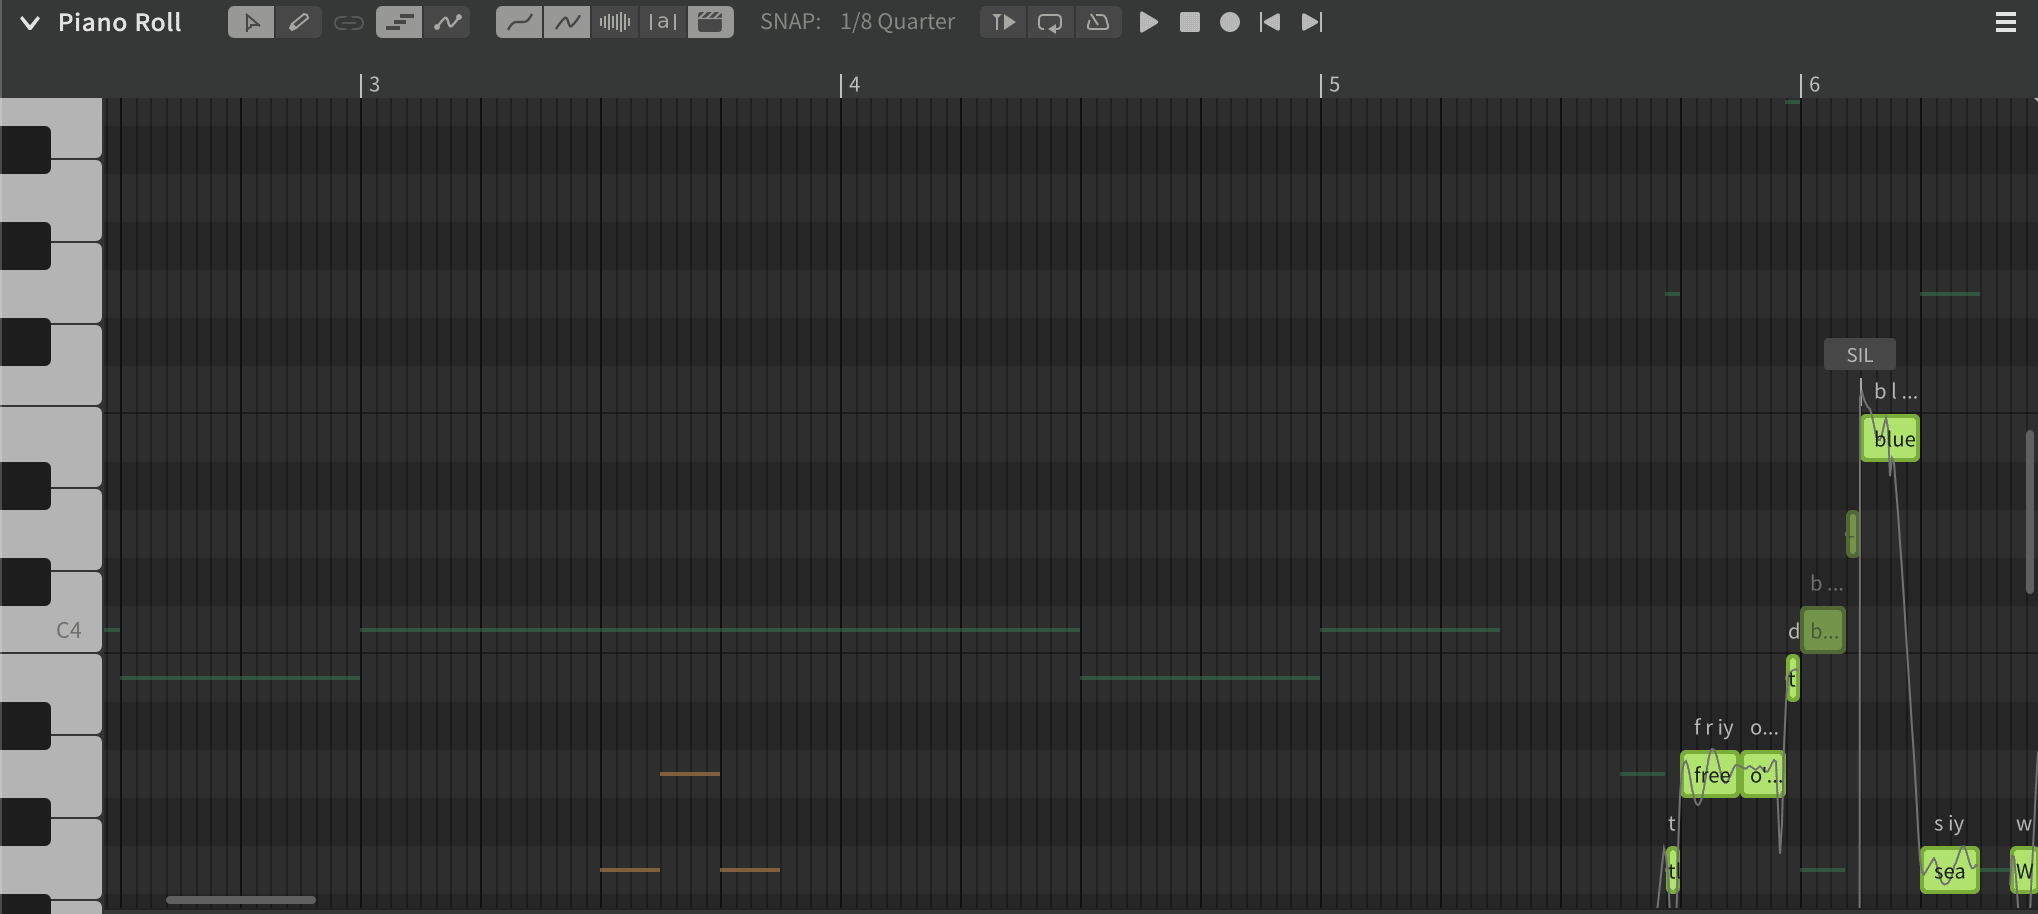
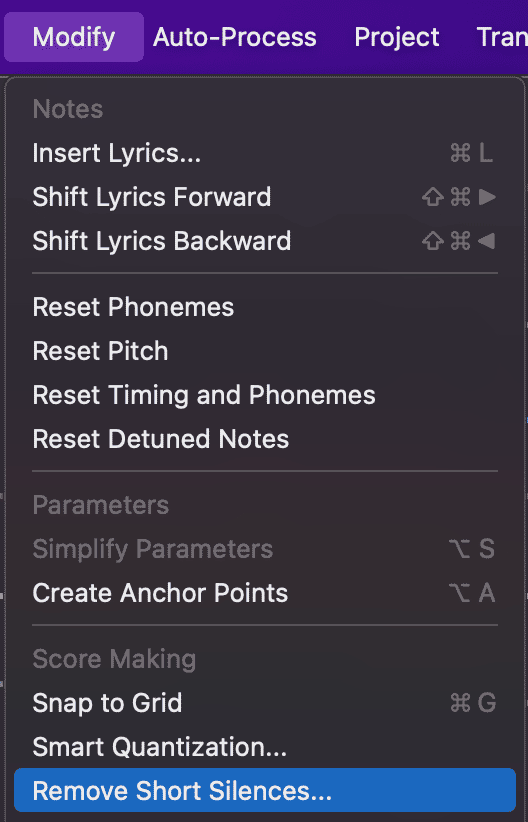
- Click Modify > Remove short silences….
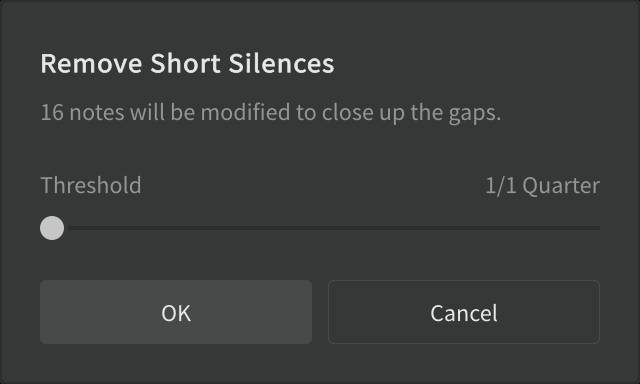
- In the Remove Short Silences dialog box, drag the Threshold slider all the way to the left. Press OK.
- For each remaining voice track, select the track, select all the track's notes, and remove short silences in the same way.
4. Import accompaniment track
- Drag the .WAV accompaniment file into a new track in Synthesizer V.
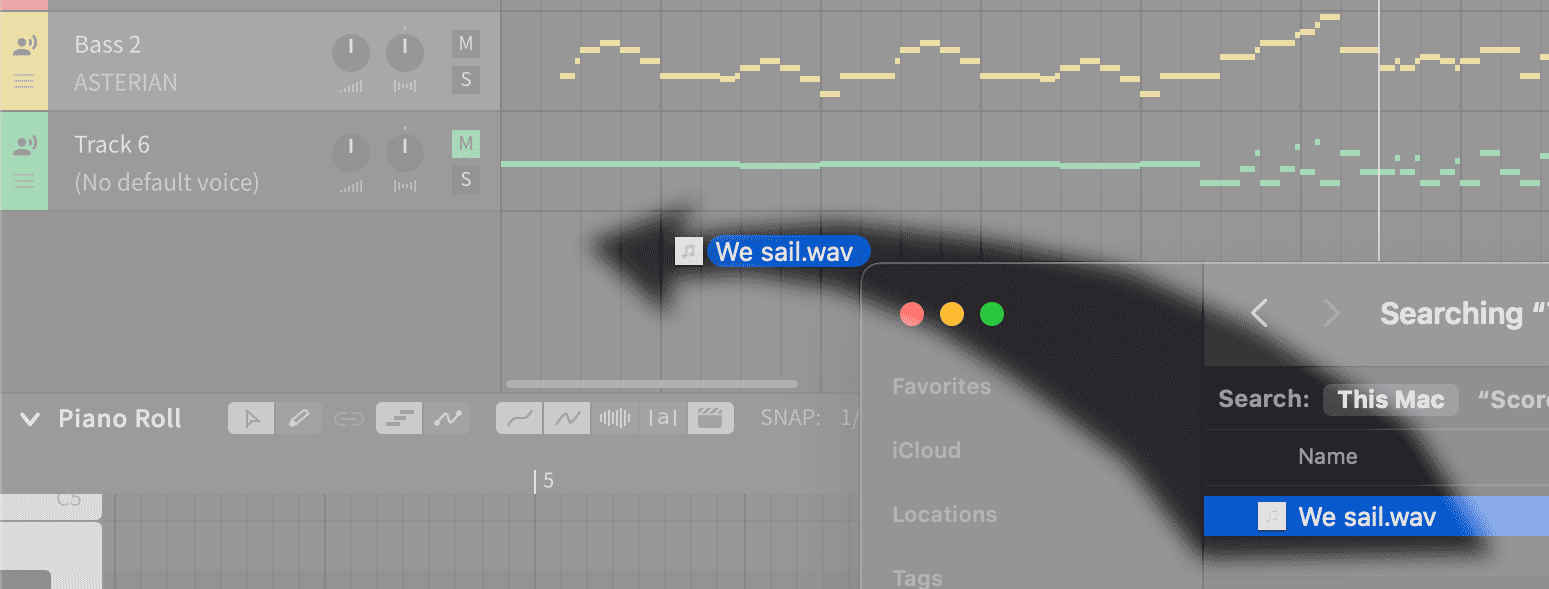
- All the tracks are now in Synthesizer V. Name the accompaniment track "Accompaniment."
-
Check the arrangement by pressing the play button in the transport controls.

-
Adjust gain and pan settings for your individual tracks, as desired. To highlight a particular voice part, lower the gain of the other voice parts. For a "balanced" mix, leave the gains at their default settings.
-
Click File > Save.
5. Optional manual fine-tuning
If just need to make rough tracks so that your chorus members have something, approximately in English to play in the car, the fine-tuning steps in this section aren't really necessary. The example audio at the top of this page didn't use any of this fine-tuning. Fine-tuning is useful if you're a composer/arranger or publisher publicly posting or selling tracks on your website.
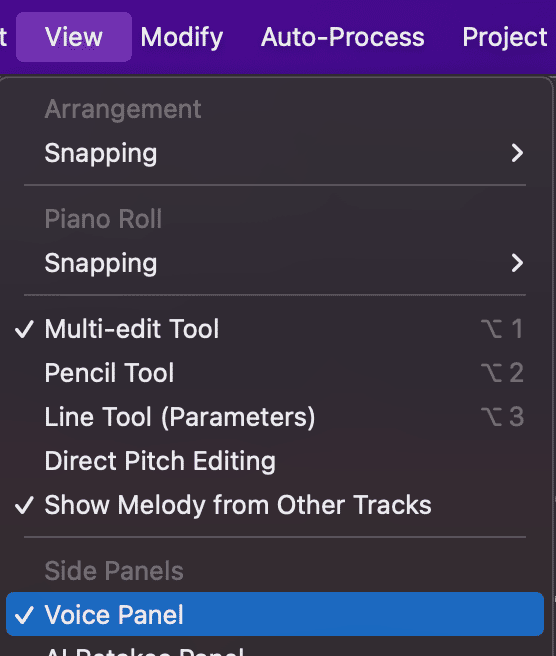
- If you don't like the amount of vibrato and scooping (Synthesizer V is pop/rock-oriented), go to View and make sure the Voice Panel option is checked.
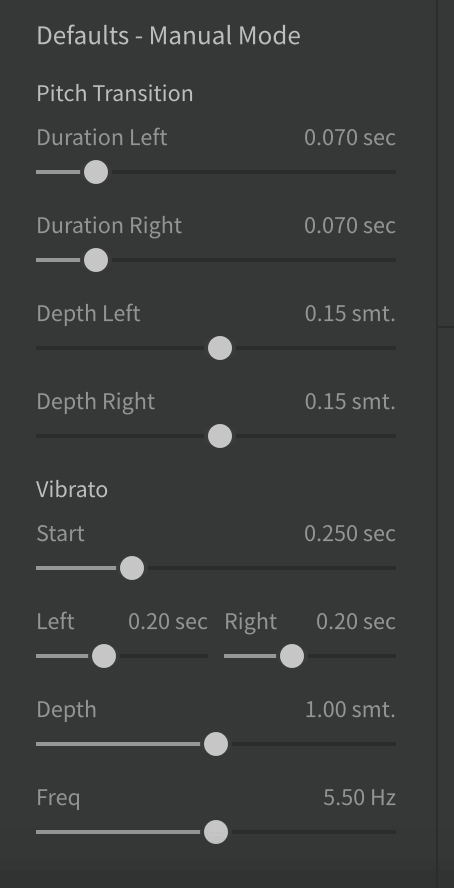
- In the Voice Panel, fine-tune Pitch Transition and Vibrato effects, as desired.
- If you'd like to correct the pronunciation for an individual syllable, double click the phoneme code(s) on top of the syllable in the Piano Roll and type in the desired ARPABET phoneme code(s). ARPABET phoneme codes are described on Wikipedia. If there are lots of examples of the same pronunciation error in your Synthesizer V project, use the steps in the following section instead of manually correcting each occurrence.
6. Batch fine-tuning of pronunciation
-
Click File > Save.
-
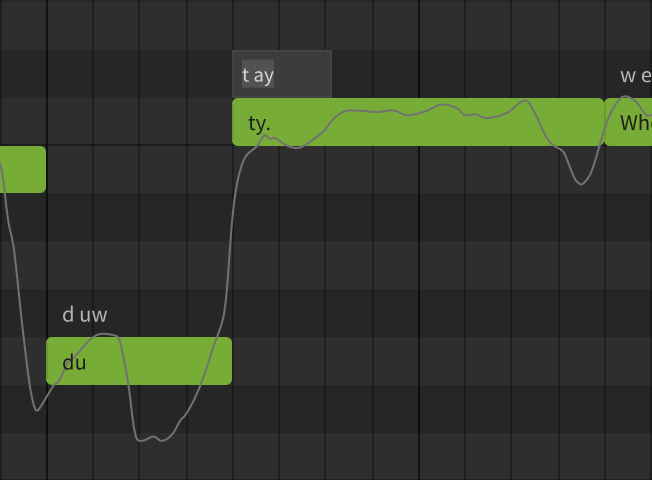
Open your Synthesizer V project (.svp) file in a text editor. Use the Replace All feature to replace each instance of the incorrect syllable-phonemes pairing, for example,
"lyrics": "ty.", "phonemes": "t ay"
with the corrected syllable-phonemes pairing, for example,"lyrics": "ty.", "phonemes": "t iy"
Save your .svp file in your text editor. - Re-open your .svp file in Synthesizer V Pro.
7. Bounce your tracks
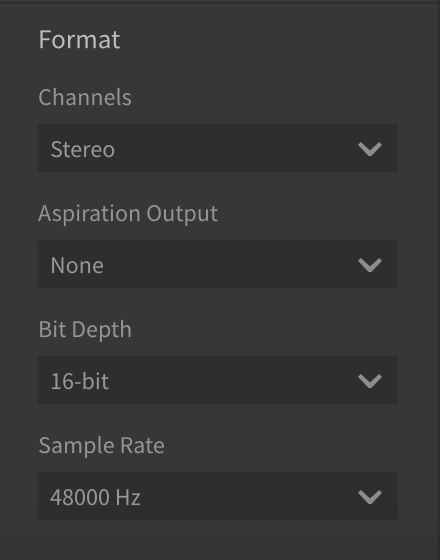
- Click View and make sure the Render Panel option is checked.

- In the Render Panel, look in the Format section. Set Channels to Stereo and Sample Rate to 48000 Hz.
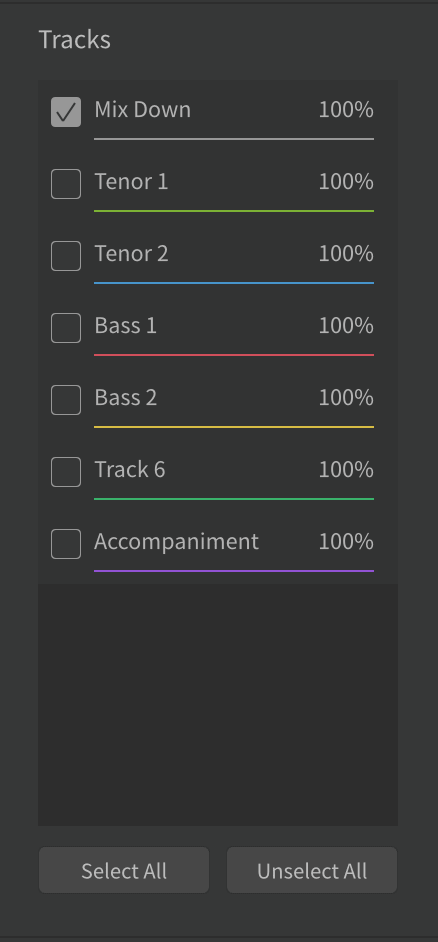
- In the Tracks section, check or uncheck tracks as desired. To output just the current mix, check only Mix Down. The other individual tracks can be exported if you'd like to remix them together in a digital audio workstation (DAW), like Logic Pro or Adobe Audition, later.
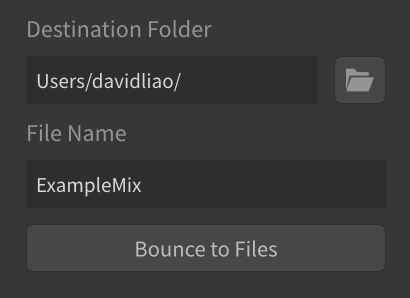
- Choose your Destination Folder. For File Name, type a filename for your audio. Click Bounce to Files. Progress will be shown in the Tracks subpanel.
- If you don't want to use a separate DAW to adjust the balance among voice parts to make additional part-learning tracks, adjust the gains and pans directly in Synthesizer V to highlight a specific voice part (example: maybe you made a Tenor 1 track and still need to make a Tenor 2 track). Bounce the updated mix using a new filename that indicates which voice part you're emphasizing. Keep making additional part-learning tracks, as needed.
8. Using bounced tracks
- Convert large bounced .WAV files to compressed .MP3 files before sharing (Audacity is fine for this).
- If you'd prefer to adjust the balance among voice parts in a separate DAW and you bounced individual voice parts (not just the mix down) in Synthesizer V, bring the exported voice parts into your DAW and adjust gains and pans to highlight an individual voice part. Export a part-learning track from your DAW. Repeat for the other voice parts you want to highlight.
Now you can make AI rehearsal tracks all on your own!